
The Remote Desktop feature on your computer “hears” remote connections by default through port 3389 when you connect to a remote computer through the Remote Desktop connection.
You can modify the registry on a Windows computer to change that listening port if you want. However, it is recommended not to use port 1-1023 as known ports when choosing a non-standard RDP port.
There is no service or application that uses port 49152-65535, which is a dynamic or private port. So, our goal in this article is to change the remote desktop port used by RDP.
While the Remote Desktop Protocol is a way to control multiple computers from one computer (Remote Control). By default, the Remote Desktop Protocol uses port 3389, which can be a problem if you want to access the server remotely.
Furthermore, when the remote computer is behind a firewall that restricts connections to standard ports, this extension is useful.
While if users are behind a firewall or router’s NAT, they cannot configure port forwarding for Remote Desktop. That’s why in this post we will look at how you can change the RDP port that the Windows server uses.
Also Read: How to Open Ports on Windows Server?
Change the RDP port in the Windows server
In this guide we will make you learn to change a Remote Desktop service’s RDP port to 33091 and to do so, you have to follow the steps that we have mentioned below:-
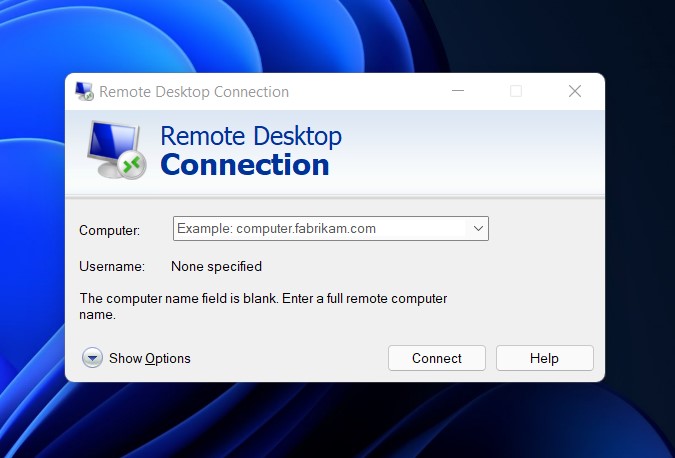
- First of all, access Windows Client/Server via Remote Desktop Protocol.
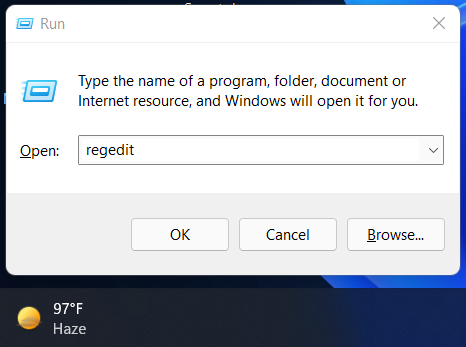
- Now you have to press the WIN+R button, type Regedit, and press Enter to launch the Registry Editor.
- Go to the Remote Desktop Registry (RDP-Tcp)
- Then you have to go to the “HKEY_LOCAL_MACHINE\System\CurrentControlSet\Control\Terminal Server\WinStations\RDP-Tcp.”
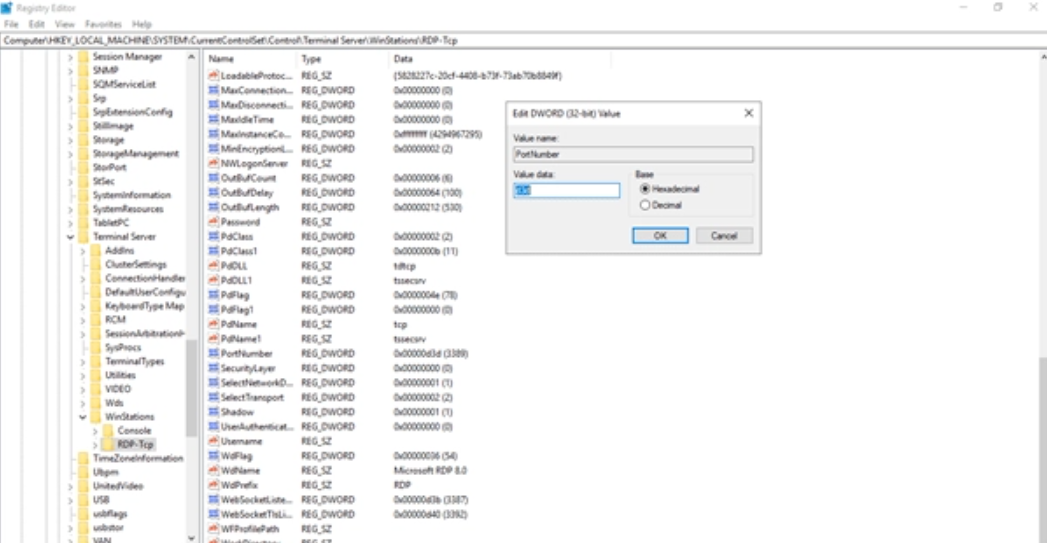
- Now here you have to change the default port number.
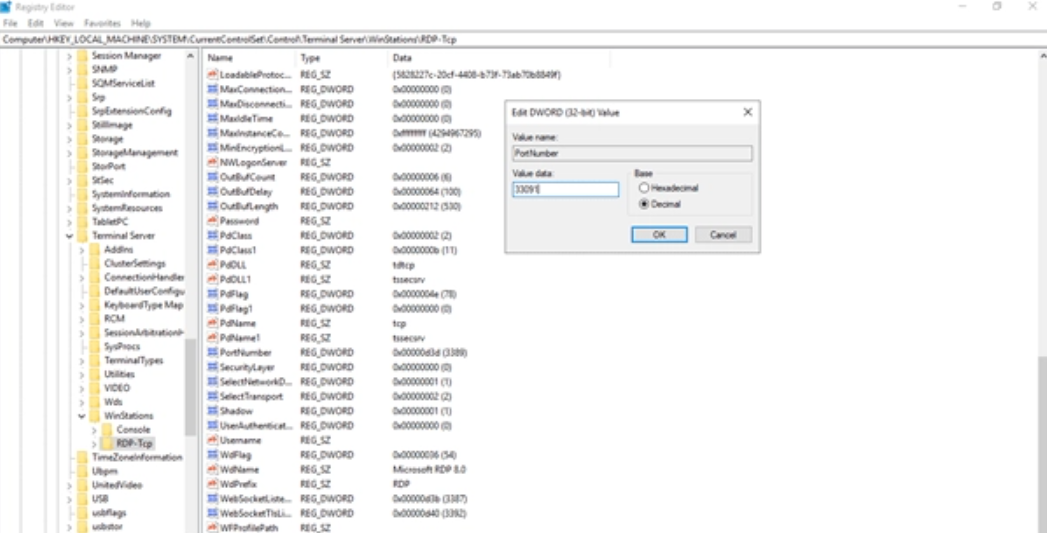
- Then you have to change the PortNumber value to 33091 (Decimal) by clicking twice on that value.
- Once done, then you have to click on the “OK” button to save the changes.
- For changes to take effect, restart Windows or RDP services from a command prompt.
- Run the following command: net stop termservice & net
- Now, after restarting via RDP you have to connect to the Windows Server, and then comprise the new RDP port.

- Then you have to confirm the listening port.
- After that using the new RDP port, connect to the Windows Server.
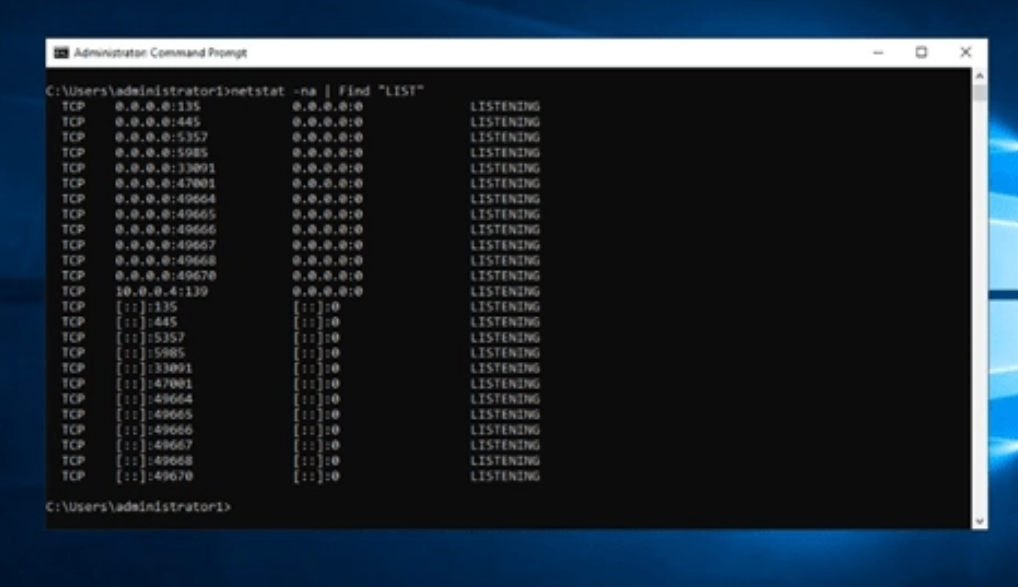
- Next, confirm Remote Desktop Service is listening on the new port by using a netstat -na | Find “List” command.
- That’s it now you are done.
The Remote Desktop Protocol (RDP) is an essential feature of the Windows operating system. It enables the remote access to a computer, with the RDP, you can remotely control your devices connected to the Internet.
The RDP is one of the most secure remote access protocols, and it uses TCP port 3389 by default. We have seen many of our users asking about the ways to change RDP port numbers.
The RDP port number can be changed by a few simple steps, and all these steps are discussed in this post. You can follow the aforementioned steps and change your RDP port number to satisfy your current requirements.
Moreover, changing the RDP port dramatically minimizes the risk of the threat actors, ports canners, and RDP weaknesses.