
RDP basically stands for the Remote Desktop Protocol which allows a computer to connect to another computer through a network to use it remotely. In an area, computers running a Windows Client operating system, such as Windows XP or Windows 10, come with RDP client software pre-installed as part of the operating system, allowing them to connect to other computers on the network, including servers on the organization as well.
In the field of information security, if an enemy has physical access to your computer or PC, then it is no longer remains your computer. Yes, it may sound a bit odd but, it’s true. As the reason for this is quite simple, once attackers have a computer in their hands, they can easily change whatever they want.
Like, they can install flawed tools such as a keylogger, remove or even delete disk drives in addition to copying them, adding whatever they want in the system, etc. It is that everything becomes exponentially easier when you have direct access to the computer. Hence, we should always take care of this, and stay secure, as an unsecured RDP connection could become a vulnerable spot for any attacker.
So, basically, a connection to a server, in this case, means that it could be directed to the server operating system, or it could be to an operating system that is running inside a virtual machine on that server. From that connection, a person can open directories, download and upload files, and run programs.
However, apart from all these things, here in this post we will now discuss how to create additional RDP users, so, now without wasting much time let’s get started and simply explore the whole tutorial that we have mentioned below.
Create Additional RDP User
Want to create an additional RDP user or account? Then you are in the right place, as here in this article we will show you the proper step by step tutorial to create additional RDP users. Hence, below we have mentioned the step by step guide.
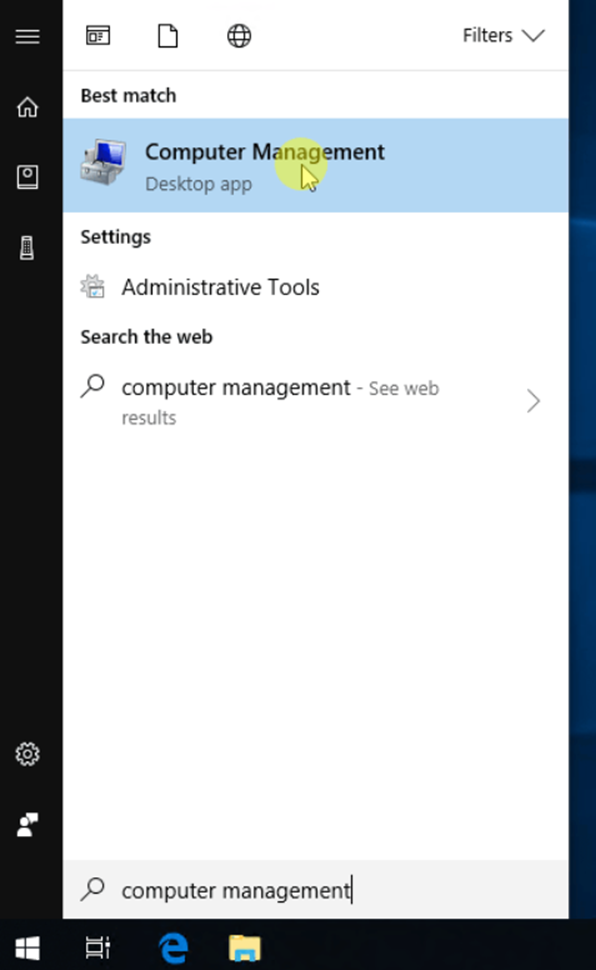
- First, you have to go to “Start Menu” and search for the “Computer Management” option.
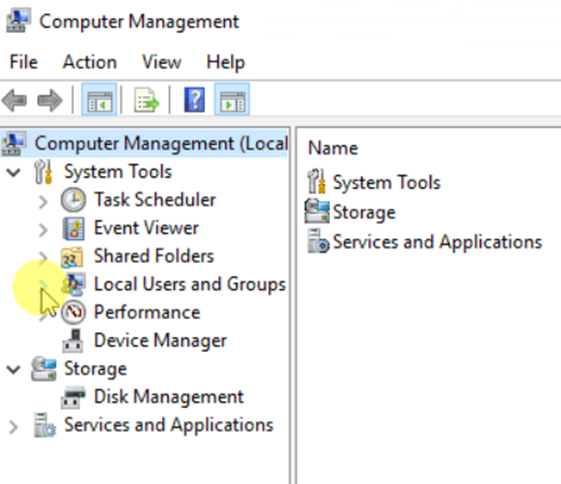
- Now simply select the “Local Users and Groups” option.
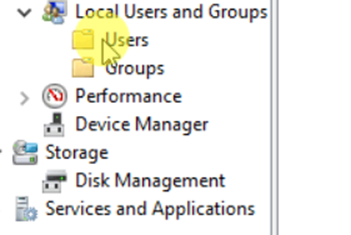
- Then you have to select the “Users” option.
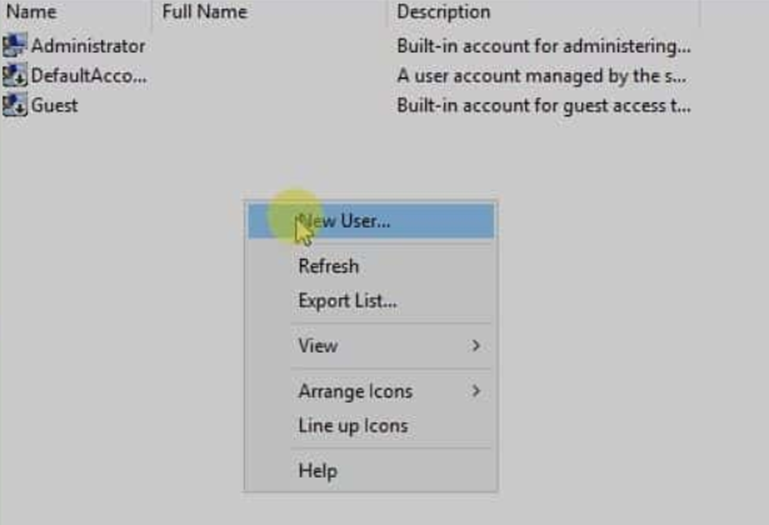
- After the above step, now you have to “Right Click” and then select the “New User” option.
- Then you will get a small window, and there you have to fill User name, full name, description, and password.
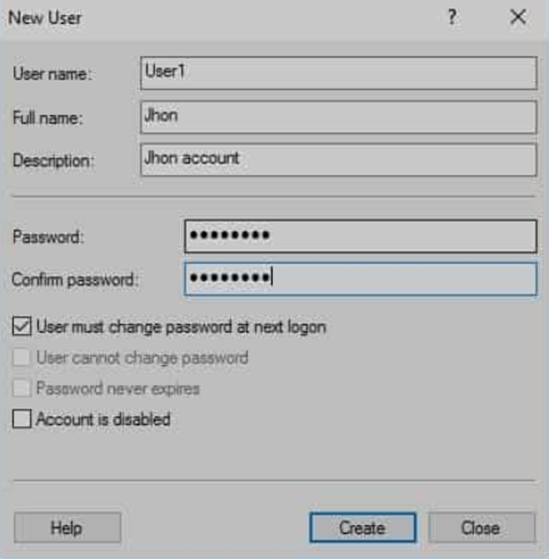
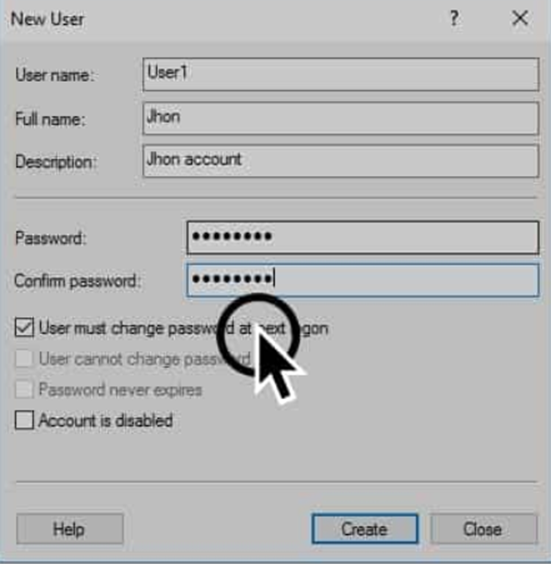
- Now you have to uncheck the “User must change password on next login” option and then click on the “Create” option.
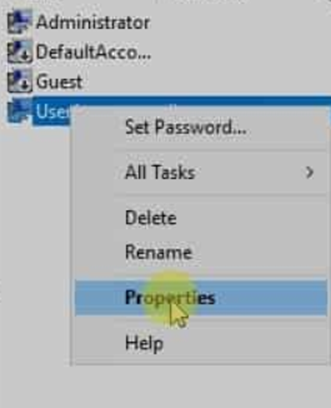
- After that, now you have to Right-click on the user and then select the “Properties” option.
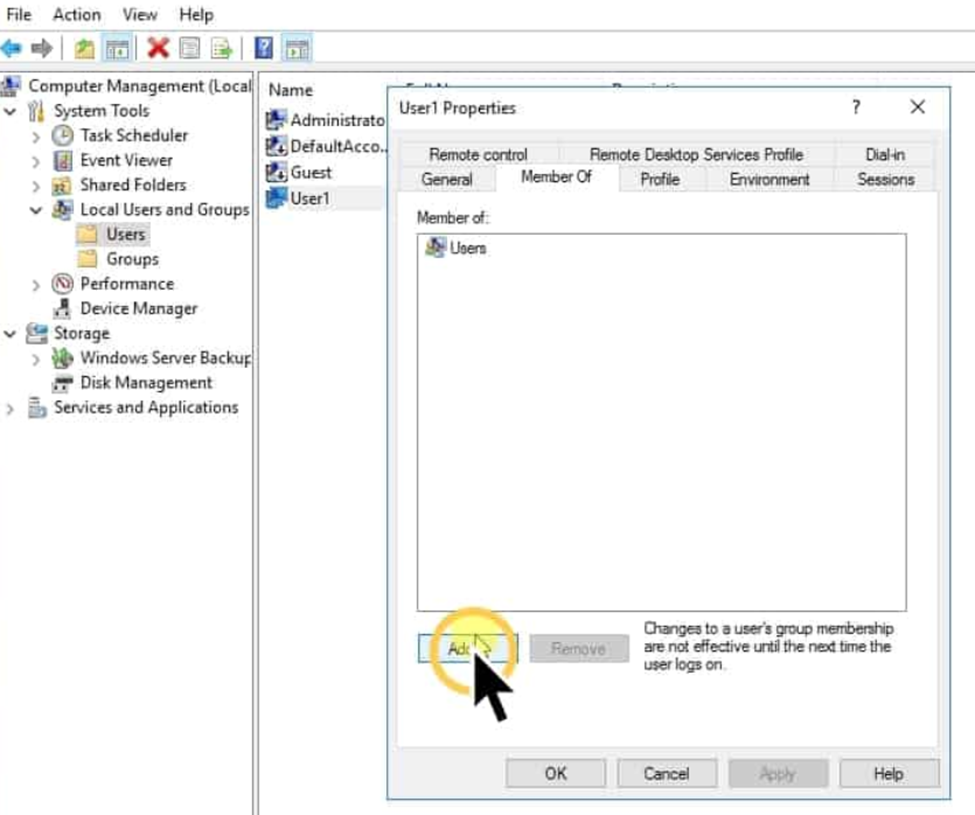
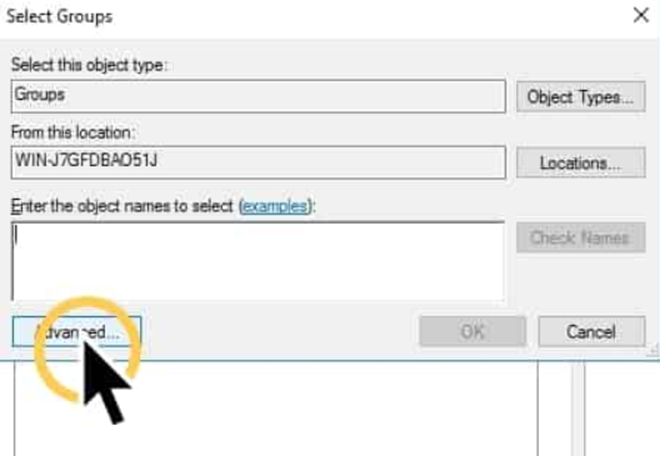
- Then you have to select the “Member Off” option and then you have to click on the “Add” option.
- Now you have to select the “Advanced” option.
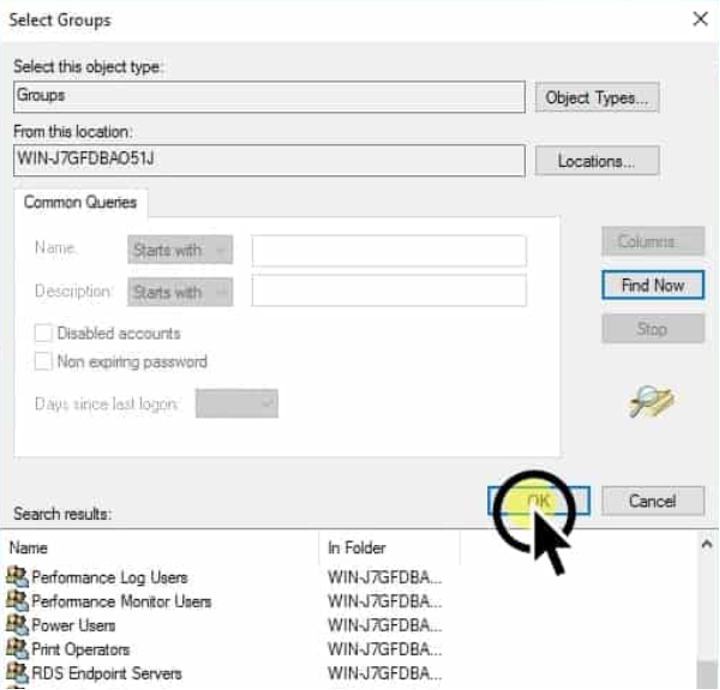
- Then you have to select the “Find” option.

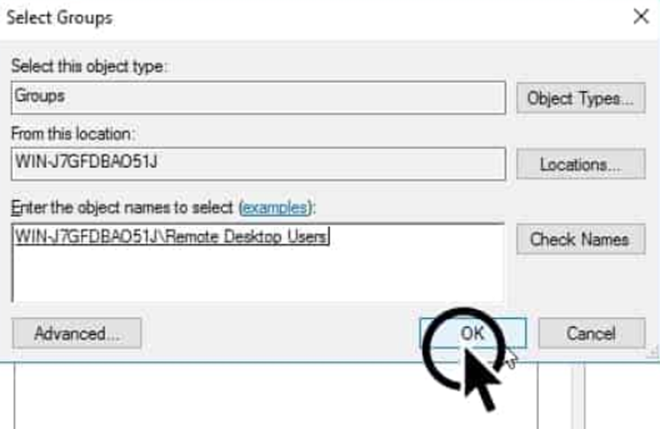
- After the above step, now simply scroll down and select the “Remote Desktop Users” option and then click on “OK“
- Now simply you have to click on “OK“, and then again “Ok“, now you will see that the user successfully added to the remote desktop group and fully working.
- Congratulations, now you are done.
So, what do you think about this? Simply share all your views and thoughts in the comment section below. And if you liked this post then simply do not forget to share this post with your friends, and family.