
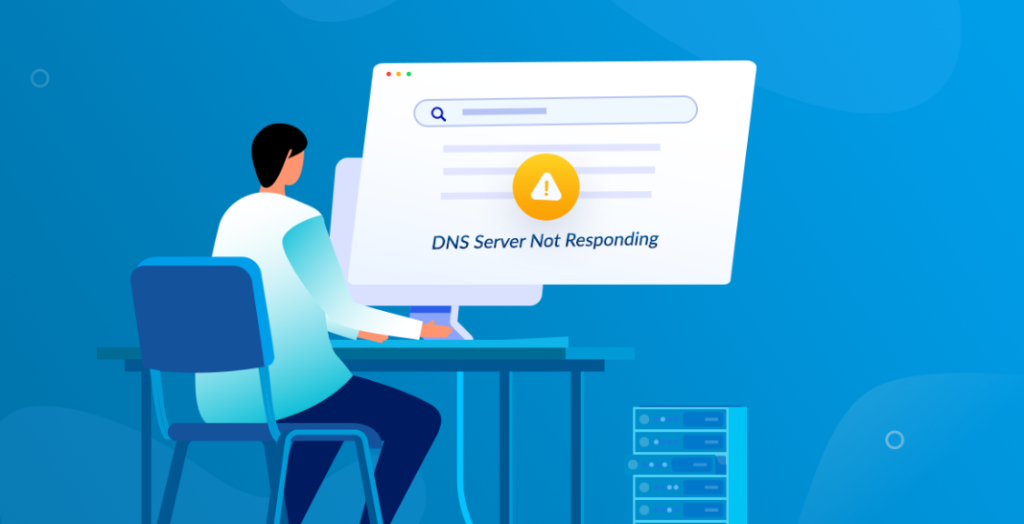
When browsing the internet, there is nothing more frustrating than encountering the “DNS server not responding” error. This error can prevent you from accessing any website, leaving you unable to browse the internet or complete online tasks. However, this error is not a permanent problem and can be fixed with some troubleshooting steps.
Domain Name System (DNS) servers play an important role in connecting you to websites. They translate human-friendly domain names into IP addresses, allowing your computer to connect to the appropriate web server. Without DNS servers, browsing the internet would be a difficult and confusing experience.
In this article, we will discuss the steps you can take to fix the DNS server not responding error. We will cover a range of troubleshooting methods that can help you diagnose and solve the problem. By the time you finish reading this article, you will have a clearer grasp of how DNS servers operate and what you can do to resolve common problems.
What is a DNS server?
A DNS server is a computer server that stores and manages domain name system (DNS) records. DNS servers translate domain names into IP addresses, allowing computers to connect to the appropriate web server.
When you type a website’s name into your browser, your computer contacts a DNS server and requests that it translate the name into an IP address. Once the DNS server has identified the IP address, it returns it to your computer, enabling you to connect to the website.
There are two types of DNS servers. Your internet service provider (ISP) employs Recursive DNS servers to resolve domain names on your computer’s behalf. Meanwhile, Authoritative DNS servers are responsible for storing and administering DNS records for a particular domain name.
How do DNS servers work?
DNS servers use a hierarchical system to manage domain names and IP addresses. At the highest point of the domain name system (DNS) hierarchy are the root DNS servers. They have a critical role in managing the top-level domains (TLDs), which include well-known ones like .com, .org, and .net.
In essence, they act as the ultimate authority on the internet and ensure that all the different parts of the DNS system are working together seamlessly. Without these root DNS servers, the internet as we know it would not be possible. Beneath the root DNS servers are the TLD DNS servers, which are responsible for managing the domain names within their TLD.
When your computer sends a request to resolve a domain name, it starts by querying the root DNS server. The root DNS server responds with the IP address of the appropriate TLD DNS server.
Your computer then queries the TLD DNS server, which responds with the IP address of the authoritative DNS server for the domain name. The authoritative DNS server then responds with the IP address of the web server hosting the website.
What Causes the “DNS Server Not Responding” Error?

There exist several causes that could trigger the error message “DNS server not responding”. Presented here are some of the most frequent factors that might engender this issue:
Inappropriate DNS settings: If the DNS settings on your device are inadequate, it will not be able to establish a connection with the DNS server. This could occur if you had previously modified the DNS settings, or if an automatic software update had made the alteration.
Issues with the router or modem: The difficulty with connecting to the internet could arise from the router or modem. A malfunctioning or improperly configured router/modem could result in your device’s failure to establish a network connection.
Presence of malware or viruses: The interference of malware or viruses with the internet connectivity of your device cannot be overemphasized. These dangerous agents could modify your DNS settings, restrict your access to specific websites, or trigger other network-related anomalies.
Troubles with the DNS server itself: The DNS server may be susceptible to issues that could lead to unresponsiveness to your device’s requests. This might happen if the DNS server is down, or it is experiencing a high volume of requests that could overwhelm its processing capacity.
Troubleshooting DNS Server Not Responding Error
If you are experiencing the DNS server not responding error, there are several troubleshooting steps you can take to resolve the issue. Here is a step-by-step guide to troubleshoot the error:
Checking internet connectivity and network settings
The first step in troubleshooting the DNS server not responding to errors is to check your internet connectivity and network settings. Make sure that your modem and router are both connected to the internet and that all cables are securely plugged in.
You should also check your network settings to make sure that your computer is configured to obtain an IP address and DNS server address automatically. To do this, go to your network settings and select the option to obtain an IP address and DNS server address automatically.
Flushing DNS cache
If your internet connectivity and network settings are both working properly, the next step is to flush your DNS cache. The DNS cache is a temporary storage area where your computer stores DNS information to speed up future requests. Sometimes, the DNS cache can become corrupted, leading to the DNS server not responding to errors.
Follow these steps:
- Open the Command Prompt as an administrator. To perform this task, you need to do a right-click on the Command Prompt symbol and then choose the option “Run as administrator.”
- You can execute the command “ipconfig /flushdns” by typing it in and then pressing the Enter key.
- Wait for the confirmation message that says “Successfully flushed the DNS Resolver Cache.”
- Restart your computer and try accessing the website again.
Changing DNS server settings
If flushing the DNS cache does not resolve the DNS server not responding error, the next step is to change your DNS server settings. Your computer may be configured to use the wrong DNS server or the DNS server may be experiencing an outage.
To change your DNS server settings, follow these steps:
- Navigate to your network settings and choose the option to set your DNS server address manually.
- Enter the IP address of a public DNS server such as Google DNS (8.8.8.8) or OpenDNS (208.67.222.222).
- Save your changes and restart your computer.
Disabling firewall or antivirus software

If the DNS server not responding error persists, the next step is to disable your firewall or antivirus software temporarily. Your firewall or antivirus software may be blocking access to the DNS server, causing the error to occur.
To disable your firewall or antivirus software, follow these steps:
- Open your firewall or antivirus software and locate the option to temporarily disable it.
- Disable the software temporarily and try accessing the website again.
- If the website loads successfully, you may need to reconfigure your firewall or antivirus software to allow access to the DNS server. Consult the software documentation for instructions on how to do this.
Resetting TCP/IP stack
Resetting the TCP/IP stack can also help resolve the DNS server not responding error. The TCP/IP stack refers to a group of protocols that regulate the way data is sent and received across the internet. Sometimes, the TCP/IP stack can become corrupted, causing internet connectivity issues.
To reset the TCP/IP stack, follow these steps:
- Open the Command Prompt as an administrator.
- Type the command “netsh int ip reset” and press Enter.
- Wait for the confirmation message that says “Successfully reset the TCP/IP stack.”
- Restart your computer and try accessing the website again.
Updating network adapter drivers
Outdated or corrupt network adapter drivers can also cause the DNS server not responding error. Network adapter drivers are software programs that allow your computer to communicate with the network adapter hardware.
To update your network adapter drivers, follow these steps:
- Go to your computer manufacturer’s website and locate the support page.
- Enter your computer model number and select the appropriate operating system.
- Download the latest network adapter drivers and save them to your computer.
- Open Device Manager and locate your network adapter.
- Right-click on the network adapter and select “Update driver.”
- Select the option to browse your computer for driver software.
- Locate and select the downloaded network adapter drivers and follow the prompts to install them.
Advanced Troubleshooting Techniques
When it comes to troubleshooting network issues, it’s always best to start with the basics. However, sometimes even the basic troubleshooting steps fail to resolve the issue. In such cases, advanced troubleshooting techniques come into play. In this section, we’ll discuss some advanced troubleshooting techniques for resolving DNS errors.
Using Command Prompt to troubleshoot DNS errors

The Command Prompt is a powerful tool that can be used to troubleshoot DNS errors. You can use the “nslookup” command to diagnose DNS issues. Simply open the Command Prompt and type “nslookup” followed by the domain name you’re trying to connect to. This will show you the IP address of the domain and whether or not it’s resolving correctly.
If the domain isn’t resolving correctly, you can use the “ping” command to check if the server is reachable. Type “ping” followed by the IP address you obtained from the “nslookup” command. If the server is reachable, you should receive responses from the server. If not, there may be a routing issue or the server may be down.
Resetting the router/modem
If you’re experiencing DNS issues, resetting your router or modem can often help. Simply unplug the device from the power source, wait for a few seconds, and then plug it back in. This will reset the device and may resolve the issue.
Checking for malware infections
Malware infections can also cause DNS issues. Make sure to run a full scan of your system using a reliable antivirus software to detect and remove any malware infections.
Contacting the Internet Service Provider
If you’ve exhausted all the troubleshooting techniques mentioned above and you’re still experiencing DNS issues, it’s time to contact your Internet Service Provider (ISP). Your ISP can help diagnose and resolve the issue, which may be caused by factors outside your control.
Troubleshooting DNS errors can be a complex process, but with the right techniques and tools, it can be resolved. Always start with the basics and then move on to more advanced troubleshooting techniques if needed. Don’t forget to contact your ISP if you’re still experiencing issues.
Preventing DNS Server Not Responding Error
Experiencing DNS server errors can be a frustrating experience for users. It can disrupt online activities and lead to lost productivity. Fortunately, there are ways to prevent DNS server errors from happening in the first place. In this section, we’ll discuss some tips for preventing future DNS server errors.
Tips for preventing future DNS server errors
- Regularly updating network settings
One of the simplest ways to prevent DNS server errors is by regularly updating your network settings. Make sure that your IP address, subnet mask, gateway, and DNS servers are all correct and up to date. These settings can be easily updated through the Control Panel or Network and Sharing Center.
- Using reliable DNS servers
Using unreliable DNS servers can also cause DNS server errors. Make sure to use DNS servers that are reliable and have a good track record of uptime. You can use public DNS servers like Google DNS or OpenDNS, or use your ISP’s DNS servers.
- Installing security software and keeping it up to date
Security software can help prevent DNS server errors caused by malware infections. Make sure to install reliable antivirus software and keep it up to date. Regularly scanning your system for malware can help prevent DNS server errors and other security issues.
- Clearing browser cache and cookies
Sometimes, browser cache and cookies can cause DNS server errors. Clearing your browser cache and cookies regularly can help prevent these issues from occurring. You can do this through your browser settings.
Preventing DNS server errors is possible with the right measures in place. Regularly updating network settings, using reliable DNS servers, installing security software, and clearing browser cache and cookies can all help prevent DNS server errors. By taking these steps, you can ensure a smoother and more reliable online experience.
Fixing DNS Server Not Responding on Mac
If you’re using a Mac and experiencing the DNS Server Not Responding error, don’t worry, there are several ways to fix it. Here are some troubleshooting steps you can try:
- Clearing DNS Cache
One of the first things you should try is clearing your Mac’s DNS cache. This can help resolve any temporary DNS issues that may be causing the error. To do this, open Terminal and type the following command:
sudo dscacheutil -flushcachePress Enter, and you should see a confirmation message. Once you’ve done this, try accessing the website again to see if the error has been resolved.
- Changing DNS Servers
Another way to fix the DNS Server Not Responding error on your Mac is by changing your DNS servers. Your ISP’s DNS servers may not always be reliable, so using a different DNS server may help.
You can change your DNS servers by going to System Preferences > Network > Advanced > DNS. Here, you can add new DNS servers and remove the existing ones. Google DNS and OpenDNS are two popular and reliable DNS server options you can try.
- Restarting your Mac and Router
Sometimes, restarting your Mac and router can resolve the DNS Server Not Responding error. To do this, turn off your Mac and unplug your router from the power source. Wait for a few seconds, then plug it back in and turn on your Mac. This will reset both devices and may resolve the issue.
- Updating macOS
If you’re running an outdated version of macOS, it may be causing the DNS Server Not Responding error. Updating your Mac to the latest version can help fix any bugs or issues that may be causing the error. To update your macOS, go to System Preferences > Software Update.
If you’re experiencing the DNS Server Not Responding error on your Mac, don’t panic. There are several troubleshooting steps you can try, including clearing your DNS cache, changing your DNS servers, restarting your Mac and router, and updating your macOS. By following these steps, you should be able to resolve the error and get back to browsing the web.
Fixing DNS Server Not Responding on Android
If you’re using an Android device and experiencing the DNS Server Not Responding error, there are a few troubleshooting steps you can try to fix the issue. Here are some of the most effective solutions:
- Clearing the DNS Cache
Clearing the DNS cache on your Android device can help resolve the DNS Server Not Responding error. To do this, go to Settings > Storage > Cached data. Here, you can clear the cache for all apps, including the DNS cache. Once you’ve cleared the cache, try accessing the website again to see if the error has been resolved.
- Changing DNS Servers
Like on a Mac, changing your DNS servers on an Android device can help resolve the DNS Server Not Responding error. To do this, go to Settings > Wi-Fi > Advanced settings > IP settings. Here, you can change the DNS servers to a more reliable option, such as Google DNS or OpenDNS.
- Restarting Your Android Device and Router
Sometimes, restarting your Android device and router can help fix the DNS Server Not Responding error. To accomplish this, switch off your Android device and unplug your router from the electrical outlet. After a brief pause, reconnect the router and switch your Android device back on. This process will restart both devices and could potentially solve the problem.
- Updating Your Android Device
If you’re running an outdated version of Android, it may be causing the DNS Server Not Responding error. Updating your device to the latest version can help fix any bugs or issues that may be causing the error. To update your Android device, go to Settings > System > Software update.
- Disabling Private DNS
If you’ve enabled Private DNS on your Android device, it may be causing the DNS Server Not Responding error. To disable Private DNS, go to Settings > Network & internet > Private DNS. Here, you can disable Private DNS or change it to a different option.
Fixing DNS Server Not Responding on iOS

If you’re encountering the DNS Server Not Responding error on an iOS device, there are a few things you can do to address the issue. Here are some of the most effective solutions:
- Clearing the DNS Cache
Clearing the DNS cache on your iOS device can help resolve the DNS Server Not Responding error. To do this, go to Settings > Wi-Fi and select the network you’re currently connected to. Then, tap on the “i” icon and scroll down to the bottom to find the DNS section. Here, you can tap on “Configure DNS” and select “Automatic” to clear the DNS cache.
- Changing DNS Servers
Similar to fixing the error on Android, changing your DNS servers on your iOS device can help resolve the DNS Server Not Responding error. To do this, go to Settings > Wi-Fi and select the network you’re currently connected to. Then, tap on the “i” icon and scroll down to the bottom to find the DNS section. To change your DNS servers to a more dependable alternative, like Google DNS or OpenDNS, go to “Configure DNS” and choose “Manual” here.
- Restarting Your iOS Device and Router
Restarting your iOS device and router can help fix the DNS Server Not Responding error. To do this, turn off your iOS device and unplug your router from the power source. Wait for a few seconds, then plug it back in and turn on your iOS device. This will reset both devices and may resolve the issue.
- Updating Your iOS Device
If you’re running an outdated version of iOS, it may be causing the DNS Server Not Responding error. Updating your device to the latest version can help fix any bugs or issues that may be causing the error. To update your iOS device, go to Settings > General > Software Update.
- Resetting Your Network Settings
Resetting your network settings on your iOS device can help fix the DNS Server Not Responding error. To do this, go to Settings > General > Reset > Reset Network Settings. This will reset all your network settings, including Wi-Fi passwords, VPN settings, and cellular settings. So, you may need to enter them again.
Conclusion
In conclusion, the “DNS server not responding” error can be frustrating to deal with, but it is a common issue that can be resolved with some basic troubleshooting steps.
Restarting the router or modem, clearing the DNS cache, and disconnecting/reconnecting to the network are all easy and quick fixes that can often resolve the issue. If these basic steps don’t work, then updating network drivers, disabling IPv6, and changing DNS server settings can also help resolve the issue.
It’s important to note that if you continue to experience the “DNS server not responding” error after trying these troubleshooting steps, then there may be a more serious underlying issue with your network or device. In this case, it’s best to seek the help of a professional or your internet service provider.
In summary, DNS is an important component of the internet, and the “DNS server not responding” error can be caused by a variety of issues. By following these troubleshooting steps, you can often resolve the issue and get back to browsing the internet without any problems. Was this article helpful for you or not? Let us know in the comment section below.
FAQs
DNS is a process that converts website names (like www.example.com) into IP addresses, which computers can then use to communicate with each other online.
Whenever you type a website’s name into your web browser, the browser will ask a DNS server to convert the name into an IP address. The DNS server then sends the IP address back to the browser, which uses it to connect to the website.
The most common causes of the “DNS server not responding” error are incorrect DNS settings, issues with the router or modem, malware or virus infections, and issues with the DNS server itself.
If you encounter the “DNS server not responding” error on your Windows computer, there are several ways to resolve it. You can try restarting your router or modem, disconnecting and reconnecting your device from the network, clearing the DNS cache, updating your network drivers, disabling IPv6, adjusting your DNS server settings, or using the Command Prompt to flush the DNS.
Yes, changing your DNS server can sometimes improve your internet speed. This is because some DNS servers are faster than others at resolving domain names.