
Windows servers are virtualized by default, which prevents you from playing any audio. We apologize to disappoint but that will not be helpful if you are thinking of bringing in additional speakers to serve your purpose.
There are many reasons why audio can be a great addition to any presentation, whether it be a sales pitch or a product demonstration. So how do you enable audio on a Windows server? Here is how you can enable audio on Windows servers.

Enable Audio on Windows Server
Now let’s explore how they can be implemented on Windows Server. Running the Windows Audio Service on your local computer is necessary in order to direct your VPS audio to your local system.
Windows Audio service is incorporated into Desktop Experience. Currently, Windows servers do not come preloaded with Desktop Experience.
- First of all, you have to go to your Server Manager.
- Then, click the Features link on the left.
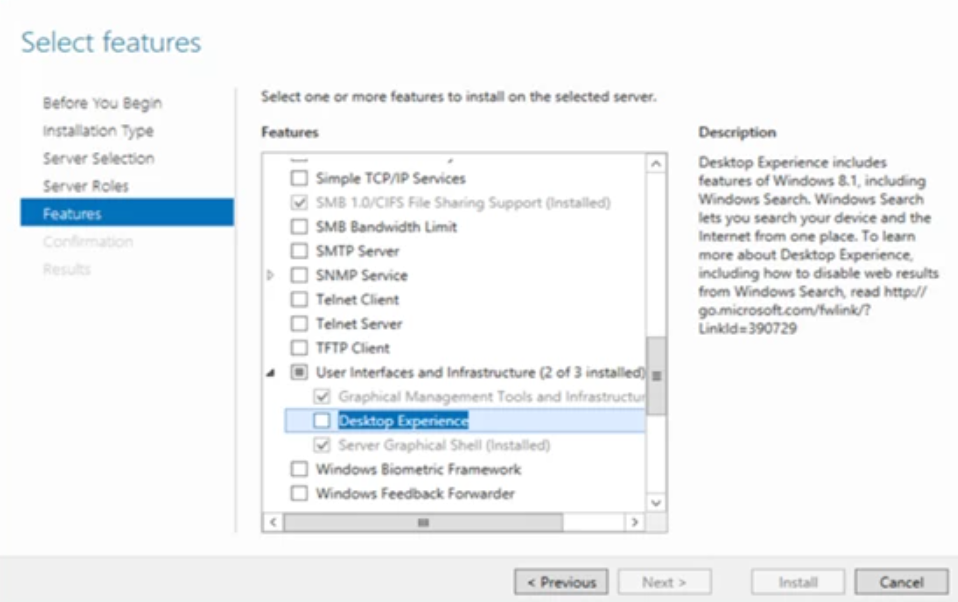
- After clicking on Add Features, you will need to select the desired feature.
- Now from the Select Features window, you have to click on the Feature Summary, and then Add Features.
- Then you will see the option, Desktop Experience and there you have to click on the install button to install it.
- Now we will configure the audio on your Windows server after you have enabled the Desktop Experience features on your system.
- Hit Windows key + R to begin the Run menu after you’ve logged into the remote machine through your Remote Desktop.
- Then in the Run dialog box, you have to type services.msc and press Enter.

- Now on your screen, a Service window will appear, and here you have to search for “Windows Audio.”
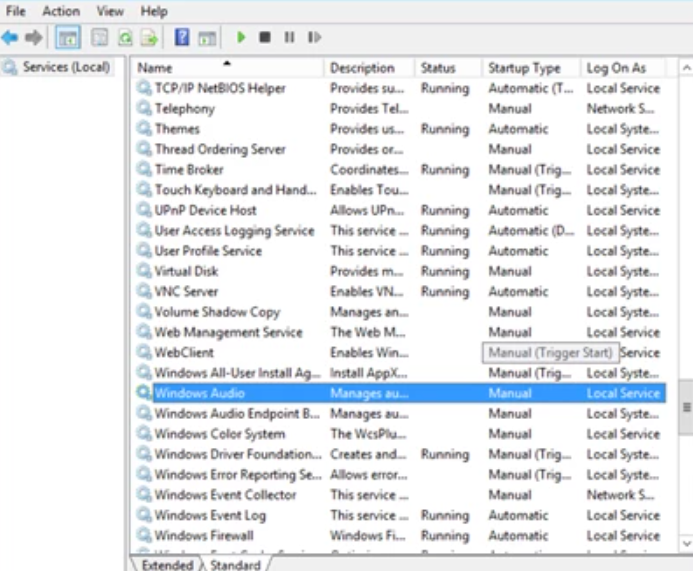
- Now, select Properties by right-clicking on it.
- After that on the next screen, you’ll see Windows Audio Properties.
- Once you’ve hit start, you need to press apply.

- Your audio service has now been enabled.
- Once done with the above steps, now to redirect sounds in the Group policy, simply follow these steps.
- Using a group policy, enable sound and audio redirection after configuring the Windows Audio service.
- In the search bar, write “group policy” and then you have to select the “Edit group policy” option.

- Following the Local Group Policy Editor, a new window appears.
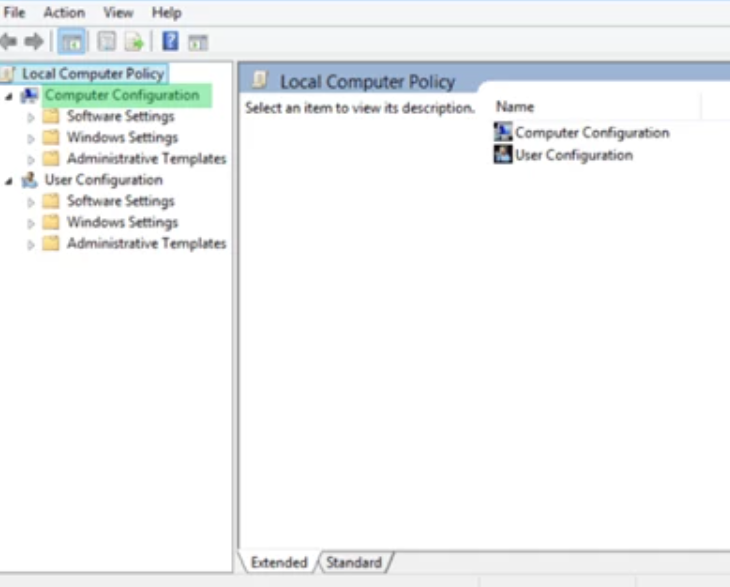
- Then you have to click on Windows Components after clicking on Configuration.
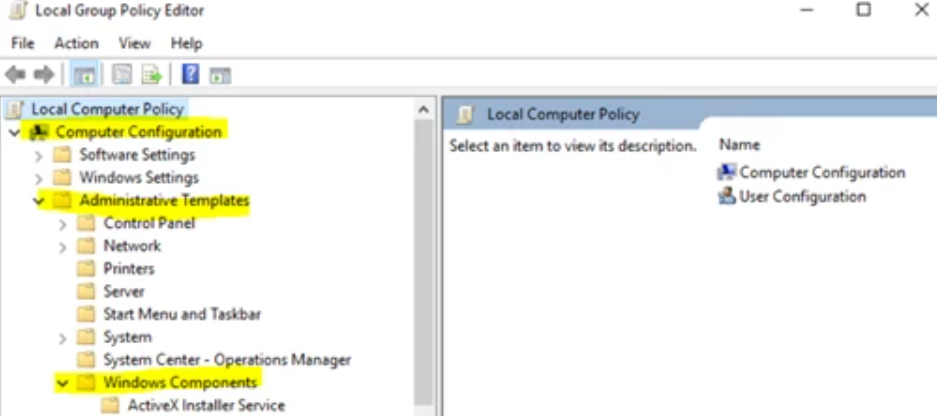
- After that, you will need to choose Remote Desktop Services.
- Next, you have to click on Device and Resources Redirection and Remote Desktop Session Host.
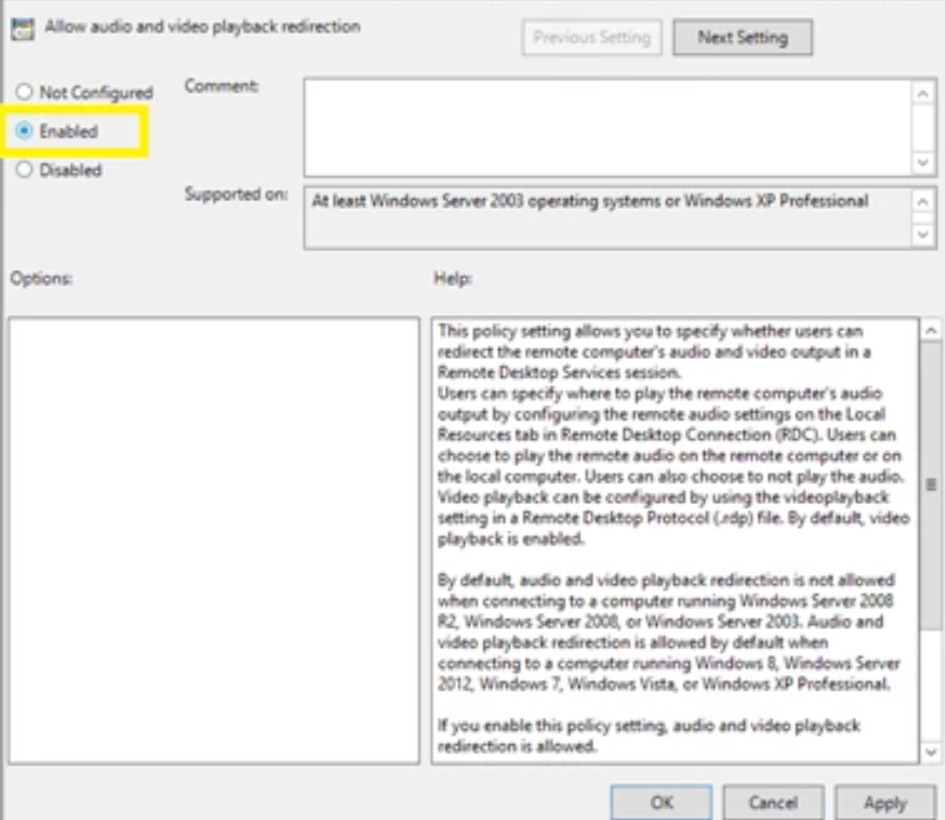
- Here to redirect audio and video playback, select the first option.

- On the next screen, you have to select “Enabled” on the “Allow audio and video playback redirection” wizard box and click on the “OK” button and then “Apply.”
- Once it has rebooted, check your notification bar upon returning.
- Finally, make sure the client allows sound playback, and you can do this by opening your Remote Desktop client.
- Once opened, now you have to select the “Local Resources” and then select the “Settings” option.

- You may now select Play on this computer by simply clicking on it.

- You’re done now, as this is the end of your work.
The following guide will explain how to enable audio on a Windows server through a remote desktop session.
Furthermore, if you think we missed any preparations or configurations, you can let us know by using the listed comments section.